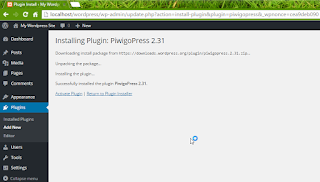
1. Piwigo Photo Gallery photos need to be integrated into Wordpress blog post.
2. Step-By-Step:
(a) Install 'PiwigoPress' plugin into Wordpress
(b) Click 'PP' icon near 'Add Media' on 'New Post' edit window
(c) Enter Piwigo gallery URL into Workpress new post
(d) Select required album
(e) Drag & Drop required photo into blue border zone on top of new post
(f) Click 'Generate and insert' piwigo code into post
(g) Also, photos can be formated in table format as follows (PiwigoPress id shall vary):-
<table>
<tbody>
<tr>
<td>[PiwigoPress id=21 url='http://localhost/piwigo/'
size='sm' desc=1 class='img-shadow' opntype='_blank'
order='undefined']</td>
<td>[PiwigoPress id=54 url='http://localhost/piwigo/'
size='sm' desc=1 class='img-shadow' opntype='_blank'
order='undefined']</td>
</tr>
</tbody>
</table>
3. Step-By-Step screenshots:-
Step-3.1:
Step-3.3:
Step-3.4:
Step-3.5:
Step-3.6:
Step-3.7:
Step-3.8:
Step-3.9:
Step-3.10:
Step-3.11:
Step-3.12:
Step-3.13:
Step-3.14:
Step-3.15:
Step-3.16:
Step-3.17:
Step-3.18:
Step-3.19:
Step-3.20:
Step-3.21:


